What's new
FORUMS - COASTERFORCE

This is a sample guest message. Register a free account today to become a member! Once signed in, you'll be able to participate on this site by adding your own topics and posts, as well as connect with other members through your own private inbox!

A Coaster is born.

Colossus

Giga Poster
So, as most of you in our little RCT3 group, have started showcasing some of your really great non competition projects on here, I thought I`d do something kind of similar but very different.
As I`m hosting the current contest, I have a bit of spare time on my hands, I`m going to give you guys a little treat.
In this thread, A Coaster is born, I`m going to give you an insight into what goes on in creating a CP10 RCT3 creation from start to finish. I`ll be posting updates with whats gone on with pictures every 60 minutes of work done, so instead of me posting a teaser shot then a finished article, you`ll see everything from a tatty piece of paper to full YouTube ready completion, along with thought processes and changes.
So...
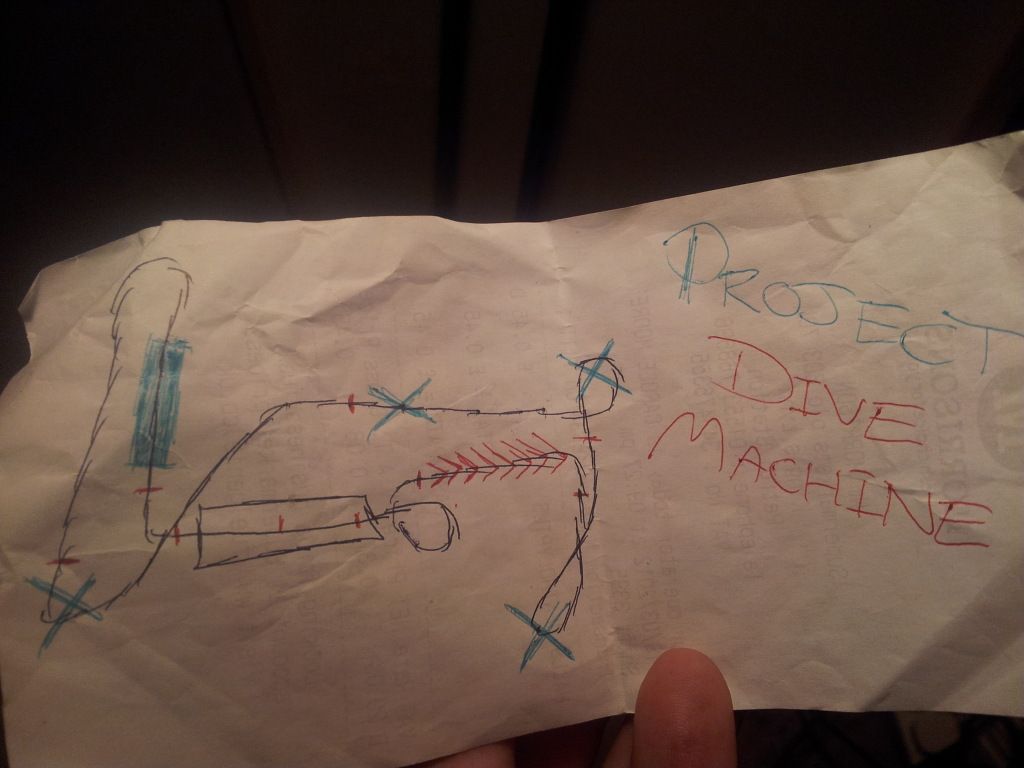
Newphonephotos840.jpg

The Blueprints
This is actually how most of my coasters will start off as, a tatty scraggly piece of paper, with some random scribbles on it, before I do these scribbles (which are always done when I`m bored at work :roll: ) I have to decide what coaster type to use, So for this one it was between a B&M Stand up, Hyper, Dive Machine. and I went with the dive machine. So time to get scribbling, this was about the 3rd attempt at a layout. So the main rectangle is obviously the station, the red arrows are the lft hill, the green X`s are inversions, red lines are block brakes and the green rectangle, well I`m not going to divulge that just yet. The final project won`t be to these exact specifications, but it will be based on the plans.
hour0.jpg

The Plot
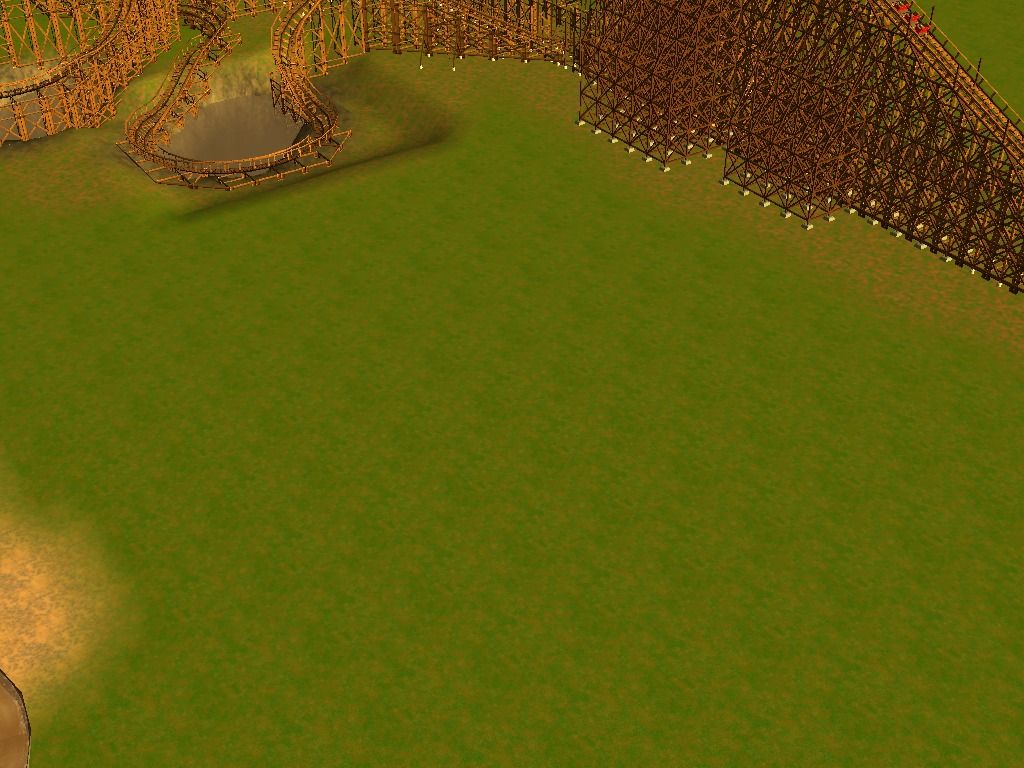
So the ride is planned for my current project, Pentney Lakes Park, which I will divulge more on once its finished, Its about 75% complete so not long, but you`ll just have to wait on that one. Anyway you can see roughly how much space I have to work with, you can see the GCI in the background and that in the bottom left hand corner is a log flume, I chose this area, because the GCI is at the back of the park and what you can`t see is that the area behind the log flume is pretty much finished. (those really observant among you will notice the log flume behind the Mega-Lite that is my contest picture) So a B&M DM should fill that space real nice.

So, updates to follow....
 
So I`ll give you my first update straight away to get us started...

1 Hour into the build.

Its worth noting at this point there`s no planned, theme and colour scheme, although the area of the park the ride is being built in is like an Atlantis sort of theme.

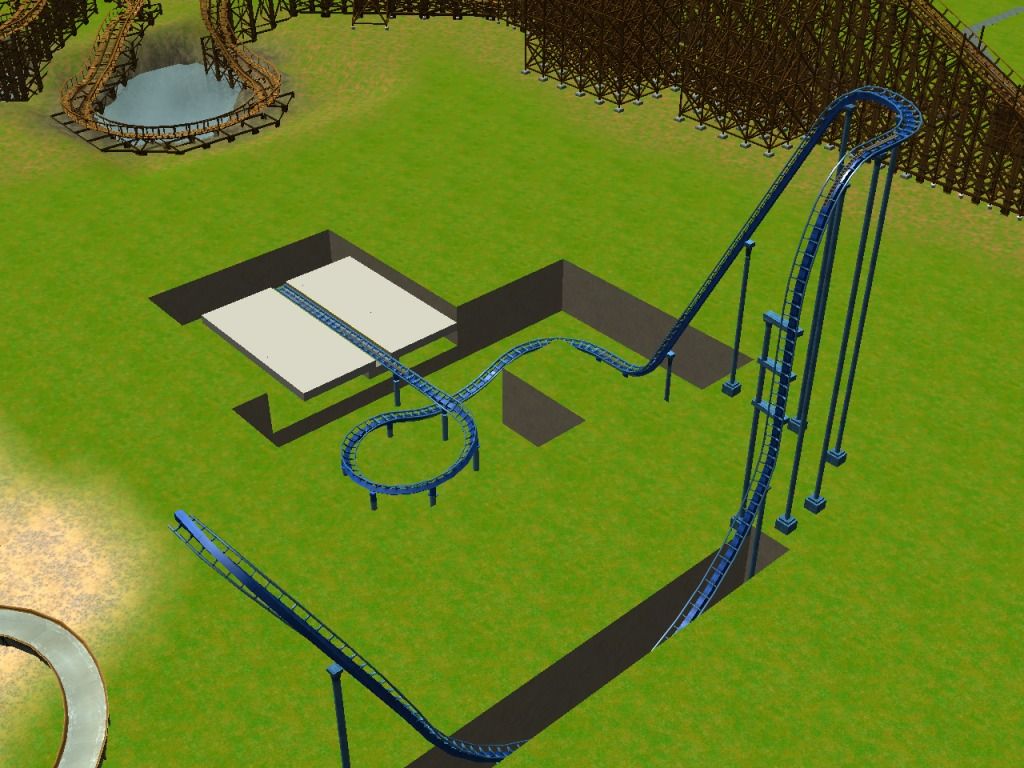
Hour1.jpg


So there`s not much really to see here, you might think, well that's not really a lot for 60 minutes of work, but getting started on the track, position of the station and lift hill , is quite important, its ok if you building your park around your ride, but building a ride already in a park has to be done right. Then making sure the track is, looks realistic, starts off nice and the train runs nice is all important to me.
So other then that you can see the base of the station, so you can see the size of the station footprint, also the gradients have been tidied up in the section between the station and lift hill.
 
Very nice idea to give us an insight on your creative process. I further realise that I use quite a different approach, finishing a beta layout first before starting thematisation.
 
I just regurgitate randomness and hammer at it in till it resembles something decent myself.

Though I do utilise many years of trial and error.
 
portemine said:
I further realise that I use quite a different approach, finishing a beta layout first before starting thematisation.

Yeah I totally understand that doing a beta layout is the most sensible way to do, I`m sort of 50/50, If I`m making a layout that is freestanding, or will have the park built around it then that's the way I would do it.
But for this coaster I`ll do it in stages, mainly because there's a lot going on in a small area, along with sub ground level sections, I find it easier to built the area with the track, so changes are easier to make.

Anyway, sorry it has taken me a couple of days to post the next updates, been sick for the last couple of days, so `i`ll give you 2 updates.

2 Hours into construction.

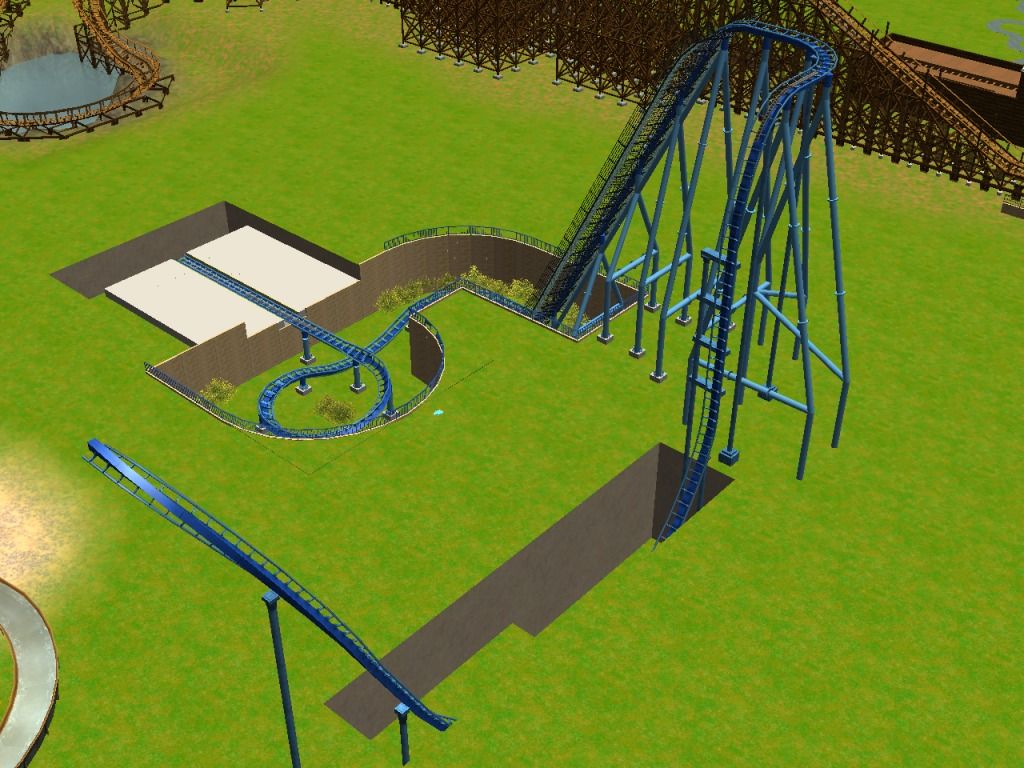
hour2.jpg


So, here we can see that the support work has started on the lift hill section and is in fact nearly complete, along with catwalks, this section was really easy and not very time consuming.
Most of the time for this update went on completing the sub ground level section between the station and lift hill, you can see the perimeter is curvier, there are some bushes down there and the support work is also complete. The support work in that section was slightly trickier then you might think, attaching the pieces to helix`s can be a ball ache. Plus the camera angle is slightly awkward, but not too bad.
 
3 Hours into construction

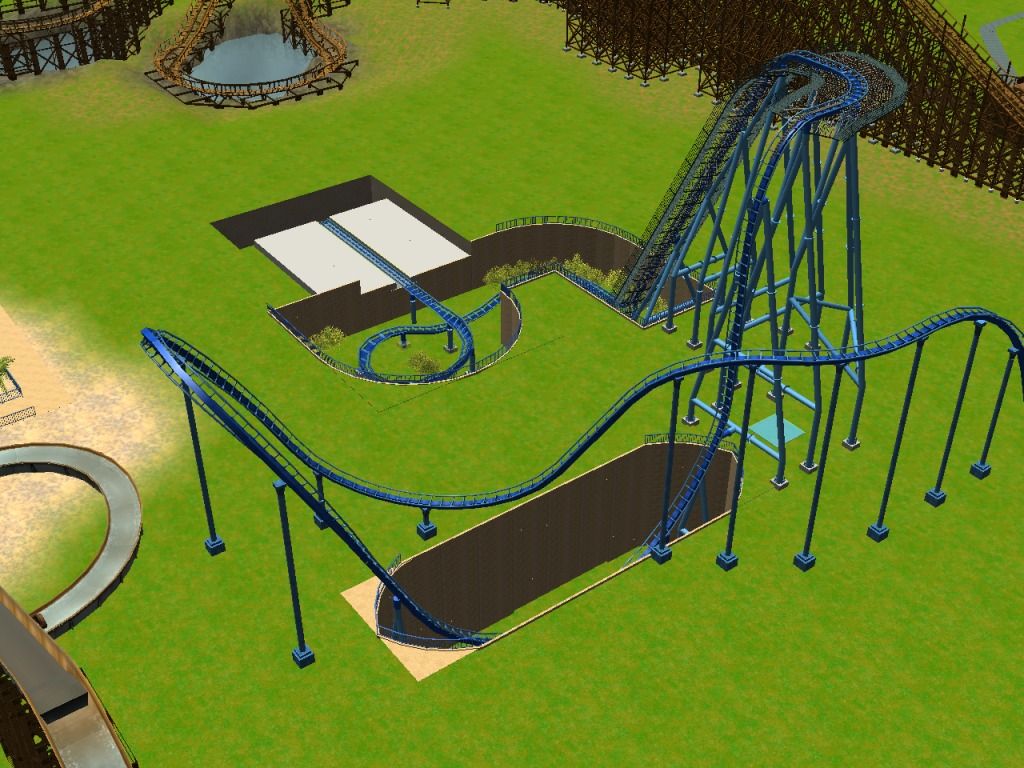
hour3.jpg


So the lift hill is now complete, the support work is done and catwalks are in place.
Main work here has been spent on the second sub ground level section, obviously any areas like this have to be quite wide, as those of you that have made a wingrider recently will know, to fit the wide trains down. This section was by no means difficult, but was time consuming as al the pieces I used as the perimeter of the hole are all 1h pieces.
Also you can see there`s a track update, the first inversion is now complete with the track running up to the first section of block brakes. I had a little play with track design here, but nothing really worked as well. I like the transition and direction change here.
 
I'm looking forward to seeing how you're going to theme your coaster. Seems that you have a relatively tiny space for your coaster, with a wooden and a flume around.

(By the way, we have radically different way of creating stuff. Yours is far more organised than mine, I add stuff without any particular order !)
 
4 Hours into construction.

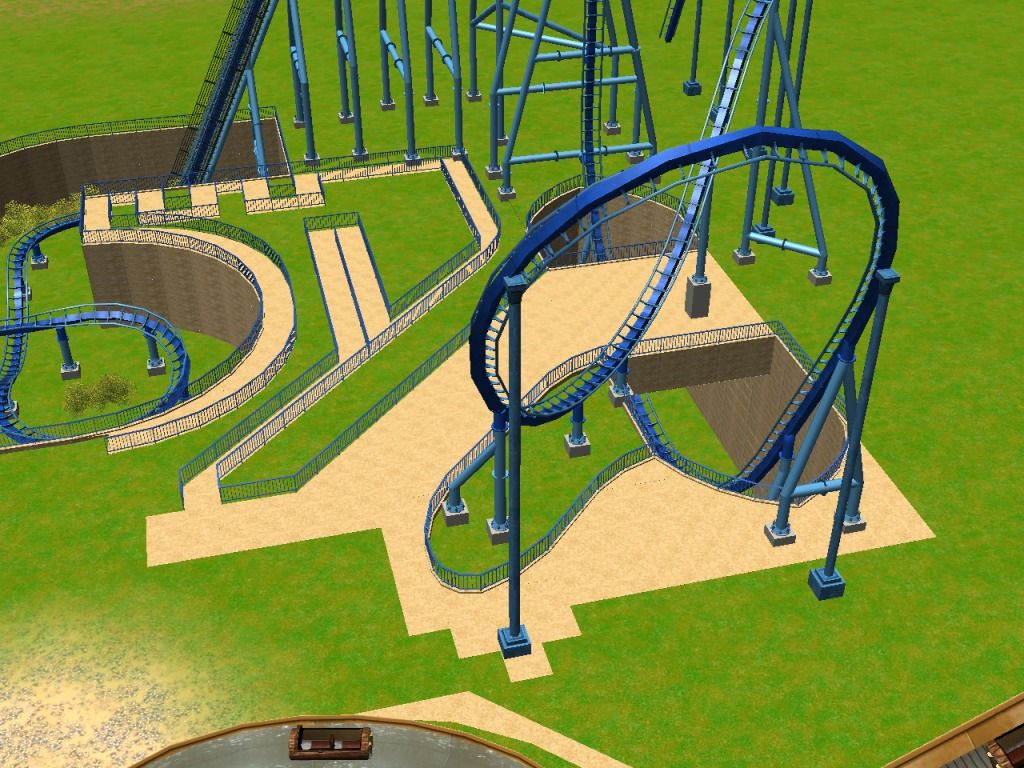
hour4.jpg


So, work here is pretty noticeable here, started work on the paths and queue line, really easy work to be honest, a little time consuming because of the different shapes involved and the addition of the fences. I think it looks good, with the random curvy sections of fence.
Also You can notice a bridge had been constructed over second sub terrain area, the only problem I have with this, is the support I have built on the bridge, probably wouldn't happen in real life, but I had to put a support somewhere in that section, So I might just leave it or I may change it at a later date.
Support work has been completed beneath the bridge.
 
Thanks Portemine, yes I think that may well be the solution, only problem is, obviously the track is don`t there, but there`s quite a bit of vertical space down there, so I might push the support down through the bridge then attach it to the walls.
 
Loving it!

What a great, unique dive machine...and the depressions in which some of the track sits should really add to the ride.

Will the station be underground? (Please!)
 
The station is below ground level, not specifically underground, I think it looks fantastic, easierly the best station I have done anyway, the update for that will in a couple of days for that.
 
5 Hours in to construction

hour5.jpg


Firstly I apologize for this picture as it doesn't really show anything, having said that there's not really much to see in this hour of work, allow me to explain.
Firstly what you can see, is that some more path that been layed, and some funny little building has arose, I don`t really know what this building is, a shop? Toilet? who knows? it`s realistic to have something like that now and again, so it can be whatever you want to be. :D Bushes have been planted in and around the queue area. That`s about it really as far as stuff to see,
Reason for this is, it is at this point I realized that my rides colour scheme is exactly like Griffon`s at BGW. Normally this wouldn't be an issue, but as there`s only a handful of Dive Machines in the world and one of the best of them is dark and light blue, I figured I should contemplate changing it. I spend ages faffing about with different colour track and support combos, but nothing looked as good as the blue, and I really wanted the blue, so after about 30 minutes of bumbling about, I decided to leave it as it is, after all Krake and Oblivion are almost the same colour. If you look at the track there`s evidence of my messing about, the track tubes on which the wheels sit are now dark blue whereas they where light blue. I should probably change it back when I get a minute.
 
This is really good, excellent work. I love the attention to detail with the shrubs and everything, lovely :)
 
^ Thank you for the appraise, attention to detail is always a big thing for me, I know its only a game, but its just the way I`am with my creative juices, I enjoy taking my time and having something really nice at the end to call my own, You`ll see this with my Forza livery (fingers crossed) :)
Foliage (as Mrs CP10 calls it) as well is always a big part of my rides, most coasters have foliage one way or another, its quick to do and looks good.
 
Back
Top