What's new

Wings3D, Help thread (NL)

There is definitely something wrong with your materials, maybe you have used the "Materials to Colors" option, select the whole objects and choose "Colours to Materials".
Or redo your materials.
Or let me have a look to see what's wrong.
 
I've been having problems with material colouring as well.
I'm making a station for Arly.

In the program it looks like this:
Station3.jpg


But when I put the station into NL, all the colours fade like this:
Station4.jpg


Whats gone wrong? :?
 
Looks like you have problems with your materials...

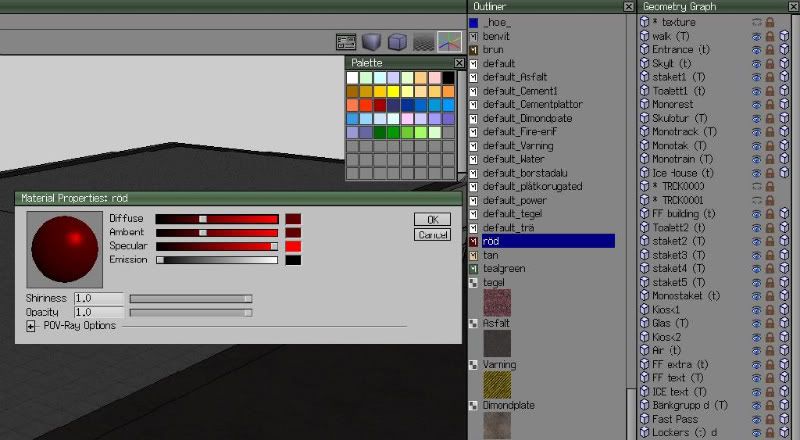
Open the Outliner (main tool bar > windows > outliner)
Select the material, RMB > edit material
And you would get a Material Properties window.

Here is how it looks and how my red I use on my swings looks as a material.
wingshelp1.jpg
 
I'll give that a try. Yaya, got a monitor for my home PC :D

Hey Coaster Ollie, how did you make that roof?
 
I have noticed that you can place objects like 'n-grid' or 'n-gon'.

When I place these objects, they always end up as i.e. pentagons, or 5x5 grids. Is there a way to change the value for n?
 
^ You either right click on it when you choose it or press the little square on the right side to get the options for the object.
 
^Thanks!

New Question!

On a couple of occasions, I've planted textures on a few surfaces, i.e. a dot for an eye (guess what I'm making a 3D model of!) or chessboard pattern for a racing flag. Simple black and white, really.
When putting it into NL, these dots or chessboard patterns disappear, only thing left is a white surface... What am I doing wrong?
 
Make sure that the textures you're using are located in the same folder as the object (in the NL objects folder).
 
Right I'm trying to do what you said to put textures onto objects.

Textures on objects:
Important the first object (top in Geometry Graph) must be visible to be able to scale the image (since Wings3D scales the image to that object).

1: Create your object/objects
2: File > Import Image (this imports the image, do this with every texture you want to use on the object).
3: Tools > Snap Image (choose which image to add to the surface).

I do this and then it ends up like this every time I try. :?
aarrghh.jpg


Thanks if you can help as I need to do some 3D's for my Thorpe 09 rec. :)

4: Select and align the Face you want your image to be located on.
5: If needed scale and/or stretch the image, by using the RMB menu.
6: RMB > Snap image, then continue to add textures or RMB > exit and you're done!!
wouldn't understand what to do even if I got that far. :lol:
 
Ok, to clear up the last 3.

4: You select the the faces on the object that you want the texture to "stick" to, select only one direction at a time, (x,y,z or other). Then align the view to that surface (so you look right at the surface).

5: In the RMB menu you have 2 options called, Stretch and Scale Image, to change the size of the image so that you have the right scale to fit the area.

6: After you are happy with the location of the texture on your object, go to RMB menu and select "Snap Image", this option snaps the image to the surface.
De-select the faces.
Either choose other faces to add textures on and go back to step 4.
Or use the RMB menu and "Exit snap mode" to exit the texture mode.

Then it should work alright.

If you have more problems then just ask me, here or MSN.


Now it almost time for bed :)
 
And my 3Ds stations continue to improve :twisted:

Next one I'll make will be my best. Complete 100% theming :twisted: MUWAHAHAHAHAAAA!!!!!!!! Uh oh, that means I have to build another coaster :(
 
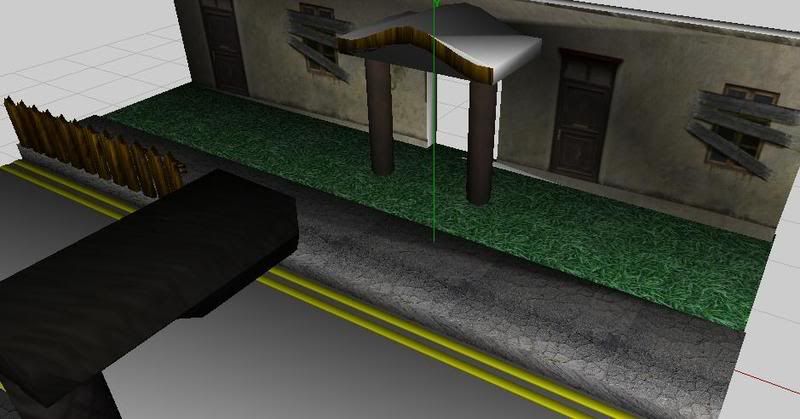
Is there a way to sort out the shadow that goes along the joint between the grass and the pavement? As there wouldn't be a shadow there in real life.
Thanks.

Haunt.jpg
 
Ollie said:
Is there a way to sort out the shadow that goes along the joint between the grass and the pavement? As there wouldn't be a shadow there in real life.
Thanks.
First of all try it out in the NL simulator.

If it's still unacceptable. Then you might want to take a look on the "Material Properties" for the texture and tweak the sliders a bit, it should be called "Default_(picture name)".
 
You can also make an environment that puts the sun directly above everything. That got rid of the fugly shadows on my objects.
 
loefet, how did you make those intamin drop tower seats in your tesla 3d model?
 
^ I started with a cube, then made a rough "boxy" shape of an Intamin seat, then applied some smoothing on it, tweaked it a bit, smoothed it again, and then tweaked it to remove all unnecessary nodes to optimize the object.

Then i added the restraint by extruding it from the head part of the seat and smoothed/tweaked it so it became what I wanted.

Then just duplicate the seat and a bit of moving and rotation, I got the full ring of seats.
 
Ok, so here's my question:

How do I make a roof like so:

hydra_l2.jpg


I'm wanting it to curve like that one, and haven't been able to figure out how to do it.
 
You have to have a flat rectangle and cut the edges into about 25.
Then highlight the end ones and move it whole holding shift or something.
Come on Xpress I though you were better than that. ;)
 
Top